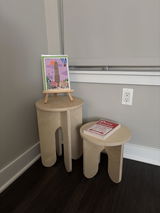
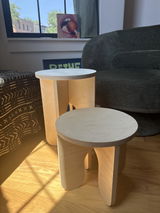
Ah, the allure of a stone side table! It's a piece that exudes a blend of rustic charm and contemporary elegance. However, acquiring a real stone table can often demand a king's ransom. But what if we told you that you could mimic that luxurious stone look without having to splurge? With a sprinkle of creativity, a dash of effort, and a hint of patience, you can transform a humble table into a stone marvel. In this DIY guide, we'll unveil the steps to metamorphose one of our unfinished side tables into a stone spectacle using textured stone spray paint. So, let’s roll up those sleeves and dive into the DIY magic!
Prepping for the Transformation
Gather Your Arsenal:
- An Unfnshed Side Table
- Rust-Oleum Ivory Satin Base Coat Paint
- Textured Stone Spray Paint
- Sandpaper (220 grit or close)
- A clean, dry cloth
- Protective gear (gloves, mask)
Set the Stage:
Choose a well-ventilated area for this project to keep the fumes at bay. Lay down some newspaper or a drop cloth to catch any paint drips, ensuring your workspace remains clean and tidy.
Your Journey to a Stone Side Table Masterpiece
Step 1: Sanding
While we sand each Side Table before it ships, we recommend touching up any rough areas, particularly edges by sanding the unfinished side table to smoothen out the surface, creating a perfect canvas for painting. Once done, wipe down the table with a clean, dry cloth to bid farewell to any lingering dust or debris. You can also use can of air if you have one, though it's totally not necessary.
Step 2: Laying the Foundation with a Base Coat

Now, onto the base coat! We like using Rust-Oleum Ivory Satin as it lays a solid foundation for the textured stone spray. A light-colored base coat like ivory, light grey, or white is ideal as it enhances the stone look while saving you from using excessive stone spray, which can be pricier. Apply two coats of the base coat paint, allowing each to dry thoroughly (about 1 hour), to achieve a richer finish. Make sure you get the edges!
Step 3: Unleashing the Stone Look

With the base coat settled, it’s time to bring out the textured stone spray paint. Shake the can well, hold it about 10-12 inches away from the table, and spray in a steady, back-and-forth motion. Allow each coat to dry for several hours, up to six. While two solid coats usually do the trick, feel free to add more coats until you achieve the desired stone effect.
After you've put your final coat, we recommend letting it set overnight so it's fully bonded to the wood.
Step 4: Assemble
Assembly takes less than a minute. Simply follow the directions provided to you. If you want to make the table a permanent structure, that you cannot take apart, use a little bit of wood glue in the slots before you assemble.

Step 5: Sealing and Protecting Your Creation
Once your table is assembled, it’s time to seal the deal with a matte spray. This step is crucial as it adds a protective layer to your table, shielding it from liquids, food stains, and everyday wear and tear, ensuring your stone masterpiece remains pristine and charming.
Revel in Your Handiwork

Step back and admire your creation! You now possess a stunning stone side table that didn’t cost an arm and a leg. This DIY endeavor not only saved you some bucks but also gifted you a unique piece of furniture that’s bound to fetch compliments.
Pro Tips
- Select a textured stone spray paint color that harmonizes with your room’s decor.
- Patience is key! Ensure each coat of paint is completely dry before proceeding to the next step to avoid any smudges or fingerprints.
Dive into More DIY Adventures
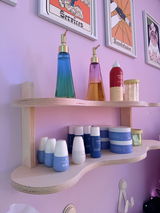
Hungry for more DIY projects? Explore our light stone tutorial for more ingenious ideas on how to infuse the elegance of stone into your home without the hefty price tag.