How to Stain Plywood: Tips Specific to Baltic Birch

If you have ever stained a piece of solid oak or walnut and then tried the same approach on plywood, you already know the outcome. Blotchy patches. Uneven color. Edges that turned five shades darker than the face. Learning how to stain plywood requires understanding why this material behaves so differently from the hardwood boards at your local lumber yard.
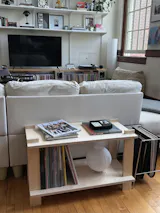
Baltic birch plywood is one of the best substrates for furniture. Its 13 alternating plies per 3/4-inch sheet create dimensional stability that solid wood simply cannot match. Its void-free core means every exposed edge is clean and consistent. But that same layered construction introduces staining challenges that catch even experienced woodworkers off guard.
This guide covers those plywood-specific challenges in detail. If you are looking for the full step-by-step staining process from start to finish, our beginner's guide to staining unfinished furniture walks through every stage. Here, we are focused on what makes plywood different and how to get professional results on birch specifically.
Why Plywood Absorbs Stain Differently Than Solid Wood
A board of solid cherry or maple has grain running in a single direction. The wood fibers are uniform, and stain penetrates at a relatively consistent rate across the surface. Plywood is engineered with a fundamentally different structure.
Each ply in a sheet of Baltic birch is oriented with its grain perpendicular to the plies above and below it. This cross-grain lamination is what gives plywood its strength and resistance to warping. But when you apply stain, each layer at the edges absorbs pigment differently based on whether you are hitting end grain or face grain. The face veneer on top behaves differently again because it is a thin slice of birch, typically between 1mm and 1.5mm thick, bonded over all those alternating layers beneath it.
Birch itself compounds the problem. It is a closed-grain, tight-pored hardwood. Unlike oak, which has open pores that accept stain readily and evenly, birch has a dense, smooth surface with inconsistent porosity. Some areas of the face veneer absorb more stain than others, which is exactly where blotching comes from.

- Grain direction: Solid wood has uniform grain. Plywood has 13 cross-grain layers that each absorb stain at different rates.
- Veneer thickness: The face of Baltic birch is only 1-1.5mm thick. Over-sanding can cut through it entirely, exposing the glue line beneath.
- Edge grain: Solid wood edges are consistent. Plywood edges expose alternating end grain and face grain from every ply, creating a striped absorption pattern.
- Porosity: Birch has inconsistent porosity across the face, leading to blotching that open-grained woods like oak rarely show.
- Glue lines: The adhesive between plies does not absorb stain at all. On edges, this creates the distinctive layered look.
The Blotching Problem (and How to Solve It)
Blotching is the single biggest frustration when staining birch plywood. You apply what looks like a perfectly even coat, wipe it back, and discover that certain areas grabbed twice as much pigment as their neighbors. The result is a mottled, amateurish look that no amount of additional stain will fix.
The cause is the variable density within birch wood fibers. Softer areas between growth rings absorb stain faster and deeper. Harder areas resist penetration. On solid birch lumber, this is already a known issue. On plywood, the thin face veneer makes it even more pronounced because you have less material depth to work with.
Pre-stain conditioner is not optional on birch plywood. It is the difference between a piece that looks professionally finished and one that looks like a failed experiment.
Pre-stain wood conditioner partially seals the wood fibers before you apply color. It evens out the absorption rate so softer areas do not pull in dramatically more pigment. On birch plywood, this step transforms your results.
Apply the conditioner with a brush or lint-free cloth, following the grain of the face veneer. Let it penetrate for the time specified on the product label, usually 5 to 15 minutes. Do not let it dry completely. You want to apply your stain while the conditioner is still active. Most conditioners give you a working window of about two hours.
One important note: conditioner will slightly reduce the overall color intensity of your stain. The trade-off is worth it. A slightly lighter, perfectly even finish looks far better than a darker, blotchy one. If you want deeper color, apply a second coat of stain after the first has dried rather than skipping the conditioner.
The Veneer Thickness Problem: Do Not Over-Sand
This is where plywood staining diverges sharply from solid wood technique. With a solid maple board, you can sand aggressively, starting at 80 grit and working through 120, 150, and 220. You have 3/4 inch of material to work with. Sand through a scratch? No problem. Keep going.
Baltic birch face veneer is roughly 1mm thick. That is about the thickness of a credit card. Sand through it, and you will hit the glue line between the face veneer and the first inner ply. Stain will not penetrate glue. You will see an obvious light patch or discolored stripe that cannot be repaired without replacing the entire face.
Start at 150 grit. That is coarse enough to smooth any roughness from manufacturing without cutting deeply into the veneer. Move to 220 grit for your final pass. Use a sanding block or palm sander with light, even pressure. Never use a belt sander on plywood faces. The aggressive material removal is designed for solid stock and will burn through veneer in seconds.
After sanding, wipe the surface with a tack cloth or a slightly damp rag. Let any raised grain dry completely, then do one final light pass with 220 grit. This step matters more on birch than on most woods because the tight grain shows every imperfection under stain.
Edge Grain: Your Secret Design Advantage
Most guides about how to stain plywood treat the edges as a problem to solve. And it is true that plywood edges behave very differently from the face. The alternating layers of end grain and face grain in each ply absorb stain at dramatically different rates. End grain acts like a bundle of tiny straws, wicking up stain fast and deep. Face grain resists penetration. The result is the characteristic striped pattern that makes it obvious you are working with plywood.
But here is what many woodworkers miss: on Baltic birch specifically, that striped edge is a feature, not a flaw.

Because Baltic birch has 13 uniform plies with no voids, the exposed edge creates a clean, rhythmic stripe pattern. When stain is applied, the contrast between the darker end-grain layers and the lighter face-grain layers becomes more pronounced, producing a look that is genuinely distinctive. Many furniture makers now intentionally expose and stain Baltic birch edges as a design choice. At UNFNSHED, exposed edge grain is central to our aesthetic for exactly this reason.
The exposed edge grain of Baltic birch plywood is one of those rare cases where the construction of the material becomes the decoration. Lean into it.
If you want to manage how dark the edges get relative to the face, apply your pre-stain conditioner to the edges as well. This slows down the absorption in the end-grain layers and brings the edge color closer to the face color. For maximum contrast, skip conditioner on the edges and let them go dark. Both approaches look intentional when executed consistently.
Gel Stain vs. Liquid Stain on Plywood
The type of stain you choose matters more on plywood than on solid wood. The two main categories, liquid stain and gel stain, interact with plywood surfaces in fundamentally different ways.
Liquid stain (also called penetrating stain) soaks into the wood fibers. On open-grained hardwoods like oak and ash, this produces beautiful, natural results. On tight-grained birch plywood, liquid stain amplifies every porosity inconsistency. It works, especially with proper conditioner, but it is less forgiving. Liquid stain is thinner and can absorb too quickly in some spots before you have time to wipe evenly.
Gel stain sits on top of the wood surface rather than penetrating deeply into the fibers. It has a thick, pudding-like consistency that you spread across the surface and then wipe back. Because gel stain does not rely on absorption to deposit color, it produces dramatically more even results on birch plywood. The trade-off is that you lose some of the natural grain transparency. Gel stain obscures grain slightly, giving a more uniform, painted quality to the color while still showing wood texture.
For Baltic birch plywood furniture, gel stain is often the better choice. It is more forgiving of inconsistent porosity, easier to apply evenly on vertical surfaces like shelf sides, and produces predictable results. General Finishes and Minwax both make reliable gel stain lines with good color range.
That said, if you love the look of grain showing through the color and you want that traditional stained-wood transparency, liquid stain with conditioner will get you there. It just requires more attention to technique.
- Best gel stain: General Finishes Gel Stain. Wide color range, consistent results on birch. Available in Java, Antique Walnut, and Candlelight.
- Best liquid stain: Minwax Wood Finish Penetrating Stain. Pair with Minwax Pre-Stain Wood Conditioner for even absorption.
- Best water-based option: Varathane Premium Fast Dry Wood Stain. Lower odor, easy cleanup, and shorter dry time between coats.
- Best for dark tones: General Finishes Java Gel Stain. Builds to a deep, rich brown without heavy blotching.
- Pre-stain conditioner (essential): Minwax Pre-Stain Wood Conditioner or Charles Neil Blotch Control for liquid stains.
Best Stain Colors for Birch Plywood
Not every stain color works equally well on birch. The wood has a natural pale yellow to cream tone with subtle grain figuring. Some stain colors play to those strengths. Others fight against them.
Colors that work beautifully on birch plywood:
Warm walnut tones are the sweet spot. Medium brown stains with warm undertones complement birch's natural warmth and produce rich, furniture-quality results. Walnut, Provincial, and Early American from Minwax all fall into this category.
Honey and golden tones enhance birch's natural color without fighting it. These lighter stains let the grain pattern show through clearly and are the most forgiving of slight application inconsistencies. Golden Oak and Puritan Pine work well here.
Gray and weathered tones have become increasingly popular for modern interiors. Classic Gray and Weathered Oak produce a contemporary, Scandinavian-inspired look on birch. Water-based stains tend to achieve cleaner grays than oil-based options.
Dark espresso and ebony tones are achievable but require more care. Multiple thin coats of gel stain build to a deep, consistent dark brown or near-black finish. Avoid trying to achieve very dark colors with a single heavy coat of liquid stain. The blotching will be severe, even with conditioner.
Colors to avoid or approach with caution: Red-toned stains like Sedona Red or Red Mahogany can look unnatural on birch because the wood lacks the undertones to support them. Cherry-toned stains also tend to appear artificial rather than warm. If you want a reddish tone, consider starting with a golden base coat and layering a touch of red-toned stain on top.
Want to see how different stain colors look on our Baltic birch furniture before committing? Our AI Visualizer lets you preview various finishes on actual UNFNSHED pieces.
Putting It All Together: The Plywood Staining Sequence
Here is the condensed workflow tailored for Baltic birch plywood. For the full expanded process with detailed instructions for each step, see our complete staining guide.
1. Sand lightly. Start at 150 grit, finish at 220. Light pressure. No belt sanders. Remember the veneer is only 1mm thick.
2. Remove dust. Tack cloth or damp rag. Let any moisture dry fully before proceeding.
3. Apply pre-stain conditioner. Brush or wipe on, following the face grain. Do not skip this step on birch.
4. Apply stain within the conditioner's working window. Brush or wipe with the grain. Work in manageable sections.
5. Wipe excess. Use clean lint-free cloths. Wipe with the grain. Do not let stain pool or sit too long on the surface.
6. Evaluate and repeat if needed. Let the first coat dry completely (check the can for recommended times). Apply a second coat for deeper color.
7. Seal with a topcoat. Polyurethane, polycrylic, or lacquer protects your stain and provides durability. Two to three thin coats, sanding lightly with 320 grit between coats. Browse our favorite finishes for topcoat inspiration.
8. Address edges separately if desired. Test your stain on a scrap edge piece first. Decide whether you want conditioned (lighter) or unconditioned (darker, higher contrast) edges.

Embrace the Material
Learning how to stain plywood well is really about learning to work with the material's nature rather than against it. Baltic birch is not trying to be solid walnut. It is something different: an engineered material with its own visual language, its own grain character, and its own rules.
The layered edges are not a defect. The tight birch grain is not a limitation. The thin face veneer is not fragile if you respect it. When you approach staining with an understanding of what makes plywood unique, you get results that look intentional, refined, and genuinely beautiful.
Start with conditioner. Sand gently. Choose the right stain type for your comfort level. Test on scrap before committing to your finished piece. And consider whether those exposed plywood edges might just become your favorite part of the finished product.
Ready to find the perfect finish for your Baltic birch furniture? Browse real finish examples from our community and discover stain, paint, and natural finish ideas that bring out the best in plywood.
See Our Finish Inspiration