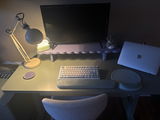
The UNFNSHED Monitor Stand ships flat in a box and assembles in under 60 seconds without any tools. No screwdriver, no allen wrench, no bag of mystery hardware. The pieces interlock by hand and hold tight through daily use.
Here's the full assembly process.
What's in the Box
Every monitor stand ships with:
- Two side panels with pre-cut slots
- One top shelf (your monitor sits on this)
- One bottom shelf (optional, for storage underneath)
That's it. No hardware bag, no dowels, no cam locks. The pieces are precision-cut from 13-ply premium-grade plywood so the joints fit snugly without fasteners.

Assembly Steps
Step 1: Stand the side panels upright
Place the two side panels on your desk, slots facing inward, spaced roughly the width of the top shelf apart. The slots are the interlocking joints that hold everything together.
Step 2: Slide in the bottom shelf
If you're using the optional bottom shelf, slide it into the lower slots on both side panels. Push it in until it sits flush. This creates storage space underneath the stand for a keyboard, notebook, or charging cables.
Step 3: Slide in the top shelf
Line up the top shelf with the upper slots and slide it in. The fit should be firm. Once both shelves are seated, the stand is structurally locked. The cross-pressure between the shelves and side panels keeps everything rigid without glue or screws.
Step 4: Place your monitor
Set your monitor on top. The stand supports well over 30 pounds, so even heavy 27-inch and 32-inch displays sit stable. For dual monitor setups, use the 42-inch version.

Tips
- Tight fit? That's intentional. The joints are cut to friction-fit tolerances. If a shelf feels stiff going in, press firmly and evenly across the edge. It will seat fully.
- Want to disassemble? Pull the shelves straight out. The stand breaks down flat for moving or storage. This is useful if you're a renter or if you want to paint or stain the pieces before reassembling.
- Finishing before assembly: If you plan to stain or paint, it's easier to finish the individual pieces before putting them together. Sand lightly, apply your finish, let it dry, then assemble. See our staining guide for step-by-step instructions.
Pair It With
The monitor stand works well alongside other pieces from the home office furniture collection:
- Modern Desk - the birch grain matches since both are made from the same premium-grade plywood
- Wall Shelves - mount above the desk for reference books and supplies
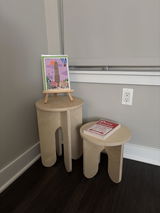
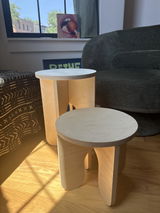
- No Tool Stool - a perching stool for standing desk setups